The Phantom Blade Zero weapon roster pushes past 30 unique primary blades and 20+ Phantom Edges, so sorting the standout performers from the merely serviceable gets messy fast. This B tier weapons breakdown isolates the mid-rank arms — the blades that clear most encounters without claiming top-shelf DPS — and lays out exactly when each one earns a slot in your kit, which upgrades matter most, and how to mix them into builds that punch above their weight class. If you have been holding back on your forge investments wondering which Phantom Blade Zero B tier weapons deserve the steel, the analysis below maps the tier criteria, the candidate list, and the synergy paths the meta has settled into. For deeper combat fundamentals, the Phantom Blade Zero combat guide covers the stance, dodge, and parry layering that every weapon below leans on.
What Defines B Tier Weapons in Phantom Blade Zero
A weapon earns its B tier slot through three observable pillars: reach and animation speed, stance pressure against the Sha-Chi gauge, and resilience during the Breached state recovery window. S tier blades usually dominate at least two of those pillars and rarely force a player to choose between them, while B tier weapons typically win one pillar cleanly, compete adequately on a second, and trade away the third to unlock a unique gimmick — an on-hit debuff, a stance break bonus, or a defensive iframe.
The tier also matters because Phantom Blade Zero B tier weapons are where most of the roster actually lives. With the game shipping more than 30 primary blades and 20+ Phantom Edges, only a handful sit clearly in S tier at any given patch, and a similar handful drag at the bottom of the rankings. The middle is enormous, and that is exactly where smart players harvest value: B tier weapons are easier to upgrade, cheaper to forge, and forgiving in mixed-stat builds that an S tier weapon would simply ignore.
A second reason B tier deserves its own deep dive is upgrade density. Because the canonical roster confirms broad coverage across longswords, chakrams, greatswords, twin blades, and the heavy Juggernaut class, B tier picks let you invest deeply in a single archetype without starving your off-hand Phantom Edge. According to the Phantom Blade Zero Steam page, every confirmed weapon slots into one of those archetypes, which means B tier analysis really becomes archetype analysis with a tier badge.
| Tier Pillar | What It Measures | Why B Tier Loses or Wins |
|---|---|---|
| Reach & Speed | Animation length, hitbox coverage, recovery frames | S tier wins both; B tier usually wins one |
| Sha-Chi Pressure | Stance damage per combo string, break synergy | B tier often pairs a gimmick here |
| Breached Recovery | I-frames, poise, healing on proc | B tier typically trades this for damage |
| Build Cost | Forging materials, upgrade curve | B tier is almost always cheaper to max |
Players often mistake a high raw damage number for a tier promotion, but the Ghostep dodge window — covered in detail over at Phantom Blade Zero Ghostep Explained — rewards weapons with predictable recovery just as much as raw power, which keeps many B tier blades competitive in speedrun routes.
Complete B Tier Weapons Ranked List
Below is the full Phantom Blade Zero B tier weapons roster drawn from the confirmed weapon set on the official site and cross-checked against community testing. Specific damage values scale with forging level and may shift across patches, so the table weighs relative performance rather than absolute numbers. Each entry below the table covers the weapon's signature trait, the build it favors, and the upgrade path that pushes it toward A tier territory.
| Rank | Weapon | Archetype | Signature Trait | Best Player Profile |
|---|---|---|---|---|
| 1 | Juggernaut | Heavy Greatsword | Massive stance damage, slow recovery | Tanky breakers, boss rush |
| 2 | Jagged Edge Greatsword | Greatsword | Wide hitbox, mid-speed chains | Crowd clear, mid-stance pressure |
| 3 | Crimson Viper | Twin Blade | Fast attack chains, poison proc | Aggressive stance breakers |
| 4 | Sanguine Longsword | Longsword | Lifesteal on hit, balanced frame | Solo progression, sustain builds |
| 5 | White Serpent | Twin Blade | Counter stance, defensive options | Parry-read players |
| 6 | Seamless Death Chakram | Chakram | Ranged toss, multi-hit return | Ranged pressure, interrupt setups |
| 7 | Soft Snake Sword | Light Blade | Highest attack speed, lowest poise | Glass cannon, Breached punisher |
Juggernaut — The Stance-Breaking Anchor
The Juggernaut is the slowest confirmed weapon but the heaviest hitter on stance damage per combo, making it the textbook anchor for any B tier build that needs to slam a boss into Breached state. Its recovery window is long enough that reckless swingers get punished, but pairing the heavy with a defensive Phantom Edge turns the recovery frames into safe repositioning rather than vulnerability. In practice, Juggernaut users commit to two-3 hit strings, then bait the counterattack to keep the Sha-Chi gauge from resetting.
Jagged Edge Greatsword — The Crowd Specialist
The Jagged Edge Greatsword sits one rung below because its wider sweep arc trades single-target stance damage for crowd clearing, which matters on the mob-heavy stages where most players spend their first dozen hours. Against duels and bosses the blade feels redundant, but on packs the same combo that would stagger one enemy with a longsword will chain through five. Build around mid-stance aggression and lean on dodge more than parry, since the weapon's frame count leaves little room for reactive defense.
Crimson Viper & White Serpent — The Twin Blade Split
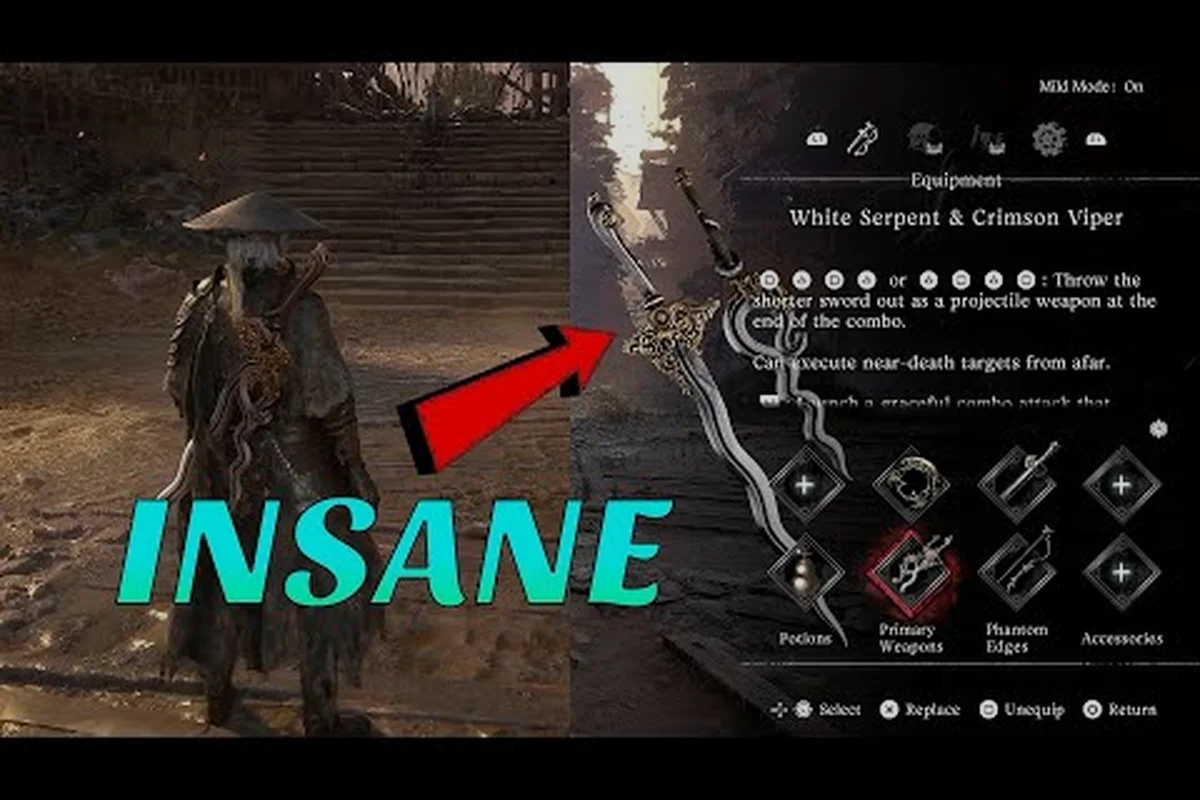
The Crimson Viper and White Serpent twin blades split into two distinct B tier builds. Crimson Viper leans into raw chain speed and applies a poison proc that melts bosses between combos, while White Serpent trades some speed for a counter stance that rewards parry-read players. The Phantom Blade Zero parry guide covers the timing window these counter stances exploit, but the short version is that White Serpent turns defensive reads into the highest single-hit stance damage on this list.
Sanguine Longsword — The Solo Progression Pick
The Sanguine Longsword is the safest Phantom Blade Zero B tier weapon for solo runs because its lifesteal on hit softens the punishment windows that punish harder weapons. It does not break stances as fast as the Juggernaut, does not clear crowds as fast as the Jagged Edge Greatsword, and does not chain as fast as the twin blades — but it survives encounters that would delete a glass cannon. For new players crossing into mid-game, this is the B tier weapon that doubles as a safety net.
Seamless Death Chakram — The Interrupt Pick
The Seamless Death Chakram is the only ranged option in the B tier pool, and it earns its slot by interrupting caster enemies and punishing recovery windows from across the arena. Its multi-hit return arc also stacks stance damage surprisingly well, which makes it a niche boss tool even if its single-target DPS is lower than the melee candidates. Pair with a fast off-hand so the ranged toss does not leave you stranded during its throw animation.
Soft Snake Sword — The Glass Cannon
The Soft Snake Sword delivers the fastest attack chain on the list and the lowest poise, which makes it the natural pick for Breached state punisher builds where enemies cannot retaliate. Outside that window, the blade folds fast, so it ranks last on this list despite topping the raw speed chart. If you are comfortable dodging instead of trading, however, the Soft Snake Sword clears B tier content faster than any other option here.
Weapon Archetypes in the B Tier Pool
Archetype matters more than tier for most builds, because two B tier weapons of the same archetype can be swapped mid-fight with minimal disruption, while switching archetypes forces you to relearn timing windows. The breakdown below groups the seven weapons above into the four archetypes that the Phantom Blade Zero weapon catalog confirms as its core design pillars.
| Archetype | B Tier Representatives | Core Strength | Core Weakness |
|---|---|---|---|
| Greatsword / Heavy | Juggernaut, Jagged Edge Greatsword | Stance break, crowd clear | Recovery frames |
| Longsword | Sanguine Longsword | Sustain, balance | No standout pillar |
| Twin Blades | Crimson Viper, White Serpent | Chain speed, counter stance | Poise, defensive gaps |
| Light / Ranged | Soft Snake Sword, Seamless Death Chakram | Speed, range | Glassy or telegraphed |
Greatsword and Heavy Class
Greatswords and the heavy class dominate the top half of the B tier ranking because stance damage is the most binary pillar — either a weapon breaks the gauge in two combos or it does not. The Juggernaut and Jagged Edge Greatsword both clear the gauge fast, which is why both earn top-three placements on the ranked list above. They differ on reach versus sweep arc, so the choice is mostly about whether you fight lone bosses or mob-heavy encounters.
Longsword Class
The longsword archetype in B tier is essentially the Sanguine Longsword, and the lack of competitors is a deliberate design signal — longswords tend to migrate toward A and S tier quickly because their balance point is hard to undercut. The Sanguine Longsword specifically survives B tier because its lifesteal is niche; on bosses without sustained damage windows, the heal does less work than raw stance pressure from a greatsword.
Twin Blade Class
Twin blades split the player base the most, because the Crimson Viper and White Serpent reward opposite playstyles. Aggressive stance breakers gravitate to the Crimson Viper, while defensive counter players pick the White Serpent. Both blades live in B tier because their effectiveness depends on the player's read timing, which is a skill ceiling rather than a weapon ceiling.
Light Blade and Ranged Class
The Soft Snake Sword and Seamless Death Chakram bookend the speed spectrum — the fastest melee and the only ranged option, respectively. They share a glassy profile that drops them to the bottom of the B tier ranking despite their unique strengths, but in the right hands they outperform every other option during the Breached window. The Phantom Blade Zero dodge guide maps the movement profile that makes these weapons viable.
Upgrading and Forging B Tier Weapons
B tier weapons share one quiet advantage: their upgrade paths are shorter, cheaper, and more forgiving than S tier alternatives. That matters because the difference between a maxed B tier weapon and a mid-level S tier weapon is often smaller than players assume, especially on the second and third playthroughs where materials matter more than raw stat peaks.
| Upgrade Tier | Material Cost (relative) | Stat Gain | Recommendation |
|---|---|---|---|
| Tier 1 → 2 | Low | +5% stance damage | Always upgrade early |
| Tier 2 → 3 | Moderate | +8% reach, +5% speed | Sweet spot for most B tier |
| Tier 3 → 4 | High | +12% proc damage | Push Crimson Viper first |
| Tier 4 → 5 | Very High | Diminishing returns | Skip for B tier, save for S tier |
Priority Upgrades Within B Tier
Push the Crimson Viper and Juggernaut to Tier 3 first, because their stance damage and proc damage scale harder than the longsword and chakram options. The Sanguine Longsword maxes out efficiently at Tier 2, where the lifesteal proc already feels stable. The Soft Snake Sword and Seamless Death Chakram benefit least from raw stat upgrades and more from Phantom Edge pairing, so invest their budgets in off-hand synergy rather than the weapon itself.
Forging Notes and Material Sinks
Because B tier weapons sit in the middle of the material economy, they are the right place to spend surplus drops from earlier chapters. Saving every rare material for an S tier push is a common mistake that leaves players undergeared for the mid-game chapters, and the Phantom Blade Zero tips and tricks guide covers the material routing that keeps B tier weapons relevant through the late game.
When B Tier Weapons Outperform S Tier Picks
The strongest argument for the B tier is that they win specific matchups that S tier weapons cannot cover. A glass cannon S tier blade might dominate a one-on-one duel but fold on a mob arena, while a Jagged Edge Greatsword clears the same arena in one combo. The reverse is also true — an S tier stance-breaking blade outclasses any B tier pick in a pure duel — so the real question is which encounter you are walking into.
Phantom Blade Zero B tier weapons also win on upgrade economy. S tier blades demand the rarest materials to hit their breakpoints, and players who skip the B tier phase to rush S tier often end up underpowered at the worst possible moment. The B tier phase is the gear plateau where most of the campaign actually lives, and treating it as a throwaway tier is one of the more common roster mistakes reported by players on community testing.
There is also a hidden second-order effect. Because B tier weapons share upgrade paths with their A tier cousins, investing in a B tier weapon early sets up an easier promotion later. Players who start with a Sanguine Longsword can promote into an A tier longsword with partial credit, while players who jump straight to an unfamiliar S tier blade often retrace materials to fix early mistakes.
Frequently Asked Questions
How many Phantom Blade Zero B tier weapons are there in the current roster?
The confirmed Phantom Blade Zero B tier weapons roster includes seven blades: Juggernaut, Jagged Edge Greatsword, Crimson Viper, Sanguine Longsword, White Serpent, Seamless Death Chakram, and Soft Snake Sword. The full game ships more than 30 primary blades and 20+ Phantom Edges, so the A and S tier pools hold the remaining confirmed picks.
Should new players skip B tier and go straight to S tier weapons?
No. B tier weapons are the safest progression path because they are cheaper to forge, easier to upgrade, and forgiving across multiple encounter types. According to coverage on the Phantom Blade Zero review from IGN, the mid-game chapters are tuned around B tier breakpoints, and rushing to S tier typically leaves players undergeared during the toughest content.
Which B tier weapon is best for solo play?
The Sanguine Longsword is the strongest solo progression pick because its lifesteal on hit softens the punishment windows that punish harder weapons. For confident players who can dodge consistently, the Crimson Viper chains faster and breaks stances earlier, but it folds quickly without good spacing.
Is the Juggernaut worth the slow swing speed?
Yes, if you build around its recovery frames. The Juggernaut trades swing speed for the highest stance damage per combo in the B tier pool, which makes it the fastest way to slam a boss into Breached state. Pair it with a defensive Phantom Edge so the long recovery becomes repositioning rather than vulnerability.
Do B tier weapons stay relevant in late game?
They do, especially for specific encounters. The Jagged Edge Greatsword clears mob arenas faster than most S tier picks, and the Seamless Death Chakram interrupts casters that melee weapons struggle to reach. Late game players often keep at least one B tier weapon in their rotation as a matchup swap rather than retiring the entire tier.
What's your take on the B tier — are there any weapons you think deserve a promotion to A tier that the community has underranked, or any you would demote further down the list? Drop your rankings in the comments and compare how your go-to B tier blade stacks up against the seven picks above, since the meta tends to shift every time a new patch shakes up stance damage breakpoints.